Sunday, March 30, 2008

tgif quickie(sunday edition)::panty sachets

Well, hello. Better late than never, right? By poplular demand (okay, it was just Melissa) I have a sweet smelling quickie for you. Mother's Day is sneaking up on us and if it's anything like the holidays in March, it will be smack in your face in no time. These make great girlfriend and shower gifts, too. Enjoy!

Get it:
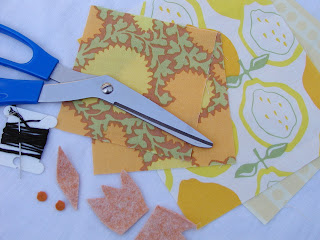
  • contrasting fabrics for waistband and panty--small bits, no larger than 3.5" x 4.5" (FYI, I got the lace-print fabric at JoAnn's a few months ago, the dot is Amy Butler. If you care.)
  • ribbon for tab (optional)
  • lavender (I get mine here. Lots of lavender that will make a buttload of sachets. Butt. Ha.)
  • needle and thread
  • paper for pattern
Do it:
  • Make yourself a panty pattern. High cuts? Granny? Thong? It's up to you. Two pieces: waistband and panty. My waistband rectangle is 1.5" x 4.5". Sketch out a panty that's around the same width at the top. Symmetry problems? Fold the paper in half and sketch half the panty. When you cut it out, both sides of the pattern will be the same. As you can see, I should follow my own tutorial. My legholes are kinda whack.
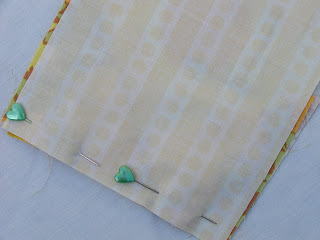
  • Pin pattern to fabrics and cut two of each piece. Pin waistband to bottom panty, right sides together. Sew together along top, repeat for other side. Iron both sides flat. Pin front to back, sandwich in your little ribbon loop on the side. I've showed it on top, loop facing in, but it should be tucked between the two sides. Pin it in there.


  • Starting middle of the top, sew all around the sides. Leave a hole when you get back to the top. At least 1" should do. I've tried leaving a smaller hole, but it just makes turning an incredibly painful, awkward, near-ripping experience. Kind of like giving birth. Clip curves and corners if you like. You don't have to. I won't tell.
  • Once turned, I like to iron it flat and smooth. Use a chopstick or paintbrush end to get all those nooks and crannies out. Make a little funnel out of paper for filling your panty with lavender. I made one out of cardstock and just stick it in the bag with the lavender so I always have it handy. Use a chopstick or skewer to help the lavender get in there. Stuff to desired fullness and stitch closed. Sha-zahm.
I sell these sachets at craft shows from time to time and at one such show a middle-aged sour-puss asked "Aren't these a little crude?" while holding up a panty sachet to her utterly-disgusted face. I'm not one for thinking on my feet...otherwise I would have retorted, "Well, they are CLEAN panties. No skidmarks, I promise."

I apologize for my poor, bluish pictures (yet again). Our cross-country trip had me a little jetlagged and I missed that early morning light. Enjoy what's left of your weekend!

Saturday, March 22, 2008

fiesta hangover


Since when do kids birthdays last a whole week long? With a preschool party, a family party on her "real" birthday and a party at the park yesterday..I'm completely birthday-ed out. Hey, I admit it--I'm a willing participant and planner in all that goes on, but sheesh. When I was a kid, we had a small dinner, cake and the gifts? Painfully practical. One year it was a bathrobe and a hairdryer. Serious.

So, planning a party on a serious time crunch? Cute, festive and simple. Thanks be to Martha for her free printable PDF's and rice crispy cars. (No, it wasn't a global warming/carbon offset birthday theme..the cars just turned out a little big for the platter. Although, they are marshmallow-powered luxury sleds. Totally green.) I saw these cupcake picks on craftpad and was hooked. I stuck those suckers everywhere. Thank god for label sheets. I love you so.


A shout-out to Mary-Ann over at Indie-Pendence for featuring my bunny. He's still homeless...so snatch him up at my shop. He's a good little bunny who deserves a life outside the rubbermaid under my bed.

I'm off for a week...so next week's tgif quckie will be on Sunday. Yeah, thanks Melissa for being the spoiler. Think lavender. Think panties. The laundry you will actually enjoy doing!

Wednesday, March 19, 2008

free tutorial!::tgif quickie::chiclet stuffie


Remember chiclets? The horrible chewing gum disguised as pretty candy? I can still hear the rattle of the box and see them peeking out the window. Open me up, little girl...we look sooo yuuummy...

This chiclet will not disappoint! Perfect for little hands and Easter baskets. Under his wing you can tuck an extra little treat or gift, too.

Get It:
  • 2 pieces of fabric cut to 5 x 6" (body)
  • 2 pieces of fabric cut to 3.5" squares (wings)
  • felt scraps--preferrably wool (eyes, beak and feet)
  • embroidery thread (eyes)
  • stuffing

Do It:
  • Iron all your chicken parts. If you're using poly felt, then leave those parts out. Your iron will never forgive you. And you'll be too pissed to finish your chick. Iron your little squares into triangles. Voila! Wings.
  • This is the super-easy-fun part. Make yourself a chicken sandwich: place back piece face up, layer on your feet toes-up, wings and front piece face down. Make sure your feet are in-between the back and wings (rather than wings and front). Otherwise, you will have one seriously deformed chicken foot...and no one loves a deformed chicken. Even on Easter.
  • Starting at the middle of the head, sew all around but leave a hole to turn the chicken out. I make that stupid mistake more than I'd like to admit...which means it happens a LOT.
  • Iron again and stuff the bird! Stitch closed. Cut a little diamond for a beak and some little eyes. I use my much neglected .25" hole punch to get a nice little circle. Otherwise, I never seem to get both eyes the same size. Use french knots to secure circles. And with a little treat under its wing--this quickie is finger lickin' good. Oh come on, you saw that one coming. For a nice, well-endowed chicken, put a chocolate egg under both wings. B-cup, C-cup--it's up to you.
Bok-bok. Happy Easter!


Tuesday, March 18, 2008

thank you from the bottom of my kitty bowl


I am completely in awe of all the visitors that have stopped by my little space to check out my tutorial. Yee-haw! Of course, the big thanks goes to Craftzine who picked it up for their blog on Monday. I'm so used to being the lurker on everyone else's blogs that I feel like I've gotten caught in the bushes with my pants down. Like--hey, hello there. Why, yes, I am wearing granny panties. But as long as you're a-looking, come back this Friday for another tgif quickie. This one will be for a little-last-minute-homemade-something for those Easter baskets. No underwear. I promise.

Friday, March 14, 2008

free tutorial!::tgif quickie::fabric collage


New and exciting! Better than housework! Every Friday I will be posting a super-easy quickie. No, not THAT kind of quickie. Get your mind out of the gutter. But you may have enough time left over for that, if you wish. Your business. Not that kind of blog. Simple stuff taking less than an hour, but still impressively cute. There ain't nothing like making something start to finish. Or getting to use the word ain't. It just feels good. And I promise there won't be a huge narrative to wade through...like this. So I'll shut up and put up. Here we go.


Get it:
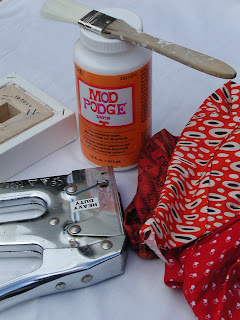
  • Small canvases, any size. I used these 4" squares because they came in a pack o'nine. Nice.
  • Nail gun
  • Mod Podge or something like that
  • Brush..well, you're not gonna use your fingers, right?
  • Fabric scraps and a piece large enough to wrap around the whole thing
Do it:
  • Center canvas on larger fabric piece, making sure it's large enough to make it to the back on all sides.
  • Pull and staple the first edge. Fold corners in hospital-like, making it super tight. Cut off excess and hammer in the staples to make them flatter, if necessary.


  • Coat the front and sides with Mod Podge. While it's drying, cut out your fabric to make a little vignette. It's fun to customize it for someone. This one with the nesting birds is for a housewarming gift.
  • Mod Podge pieces and slap 'em on. Coat again until it's saturated and all the wrinkles/bubbles are gone. You can seal the whole thing again later with another coat if you want.
  • Finish the back by hot-gluing a piece of paper cut with those paper edgers left over from your scrapbooking phase. Try to cover the staples, but don't stress over it. See, I've got one sticking out.
  • Attach a loop or sawtooth hanger from the hardware store. So handy to have around. There you go. Collage. You be done.
me, too.
Happy weekend.


Thursday, March 13, 2008

Finally she's mine..all mine


Have I ever mentioned my childhood obsession over Mary Poppins? I watched that OCD, uptight-but-gorgeous, Bert-flirter and immediately wanted to be her. I prayed for gusty storms to blow in so I could be out there with my umbrella--certain that this would be the time I would finally take flight. She wasn't all oooey-gooey lovey like so many other heroines of my day. In fact, she had an edge. She turned reality on its head and looked at those dang kids like THEY were the ones with the problem. I loved that. She was tough. Confident. Brash. She inspired me to use the word "nonsense" a lot. Now as an adult, I'm fairly certain she also had whips and handcuffs in that giant carpet bag. Right next to her coat rack, lamp and measuring stick. She'll always be 'practically perfect' to me. And I can craft her myself! Pattern available here and here among others. Lordy lordy. The hat. The bag. Even the scarf. I would jump up and down with excitement, but I know that Mary would play it much cooler than that.

Monday, March 10, 2008

more little friends


Saturday's show had tons of traffic and wonderful live music. I didn't sell much, but had a great time chatting with Amy and Sophia. I hadn't made much new stuff and since the booth was free, who can complain? It was such a pretty evening, too. Lots of deep breaths. Can winter really be over?

As much as I love design*sponge (and typing it is fun, too!), it makes me want to push all my belongings to the curb and light them on fire. Such beautiful, clean spaces with quirky collections. Not exactly my reality--unless you count miscellaneous toy pieces and animal hair as "quirky collections". The big clean is coming but since it hasn't tapped me on the shoulder yet, I think I'll just wait a few more days to get started. And possibly cut out fabric for a few more critters.

Thursday, March 6, 2008

serendipity


Last night the stars aligned and I was able to make this little guy from start to finish with no huge hassles. I am borrowing a friend's sewing machine and was a little nervous about using it for the first time. I pulled it out of the box (it's brand a spankin' new Janome) with sweaty palms and nervous anxiety--much like a first date. I read the manual cover to cover, started sewing slowly and fell completely and utterly in love. It sewed like buttah. We were like peaches and cream, frosting and sprinkles, chocolate and peanut butter...well, you get the idea. My apologies to my $99 Brother machine that is now in the closet. Get used to it.

More critters to come..

Tuesday, March 4, 2008

falling behind...


I haven't posted in March yet? Hmmm. I feel like a big wave is cresting behind me and I'm about to get pummeled. Going out of town and returning to mountains of laundry, crabby/sick-ish kids with busy schedules and a show coming up this weekend make me feel like I will not make it up to the surface for air in time. I know most people are celebrating the beginnings of spring--lots of beautiful pictures and words out there in blogland--but, honestly, I am finding it a bit disorienting. The in-between kills me.

Okay, whining's over. I put a few of my new pendants in the shop last week. Not much action on those or the little purses, so they'll be traveling with me on Saturday. We'll be at the Second Saturday Artist's show at McMartin Realty in Sacto (5-9 p.m.) where I'll be sharing a table with the lovely and talented Amy. I'll be making some good deals to clear the way for new creations. So stop by and say hello! I might even have cupcakes. Now you have no reason to say no.

cold mornings turn to
warm days--all life is hurried,
frantic + pushing forth